A friend was having trouble keeping track of his usernames and passwords. (Too many sticky notes…)
I know there are a zillion password manager programs. Many are good, and some cost money. I have been very pleased with the Bitwarden password manager: it's free, open source, and they won't sell your information. Here is the note I sent to my friend describing how to get started. I'm posting it here in case I need it again.
—
This is an intro to Bitwarden – a free Password Manager. It helps you keep track of all your passwords. I like the company because they don't track you and won't sell your info. I use Bitwarden myself to manage hundreds of passwords on various sites and servers, and have recommended it for several organizations that I’m associated with.
Bitwarden is a great way to get rid of all those stickies. It creates a vault for all your passwords. Once you log in to Bitwarden, you enter the credentials (the website link/username/password) from each of the stickies: Bitwarden saves that information in your vault so you can use it to log in later.
To get started, go to vault.bitwarden.com.
Click the “Create account” link at the bottom of the page. Enter your name and email. (Also choose “bitwarden.com” from the “Creating account on” field.) They’ll send a confirmation email. You click it, then you will be asked to create a "master password”.
The Master Password is a most important thing. It’s the key that unlocks the vault that holds all your passwords. Write down both the email you used and the Master Password right now! (This is the one time I recommend people write down their password.) Put the paper someplace safe: in an envelope in your desk drawer, in your safe deposit box, or give it to a trusted friend (or all three). DO NOT FORGET the Master Password. Bitwarden does not retain a copy of the Master Password and if you lose it, there is no way to get your information back.
Once you've done this, you can add information from each of your sticky notes to the vault. To do this:
- Click the “+ New” button at the top.
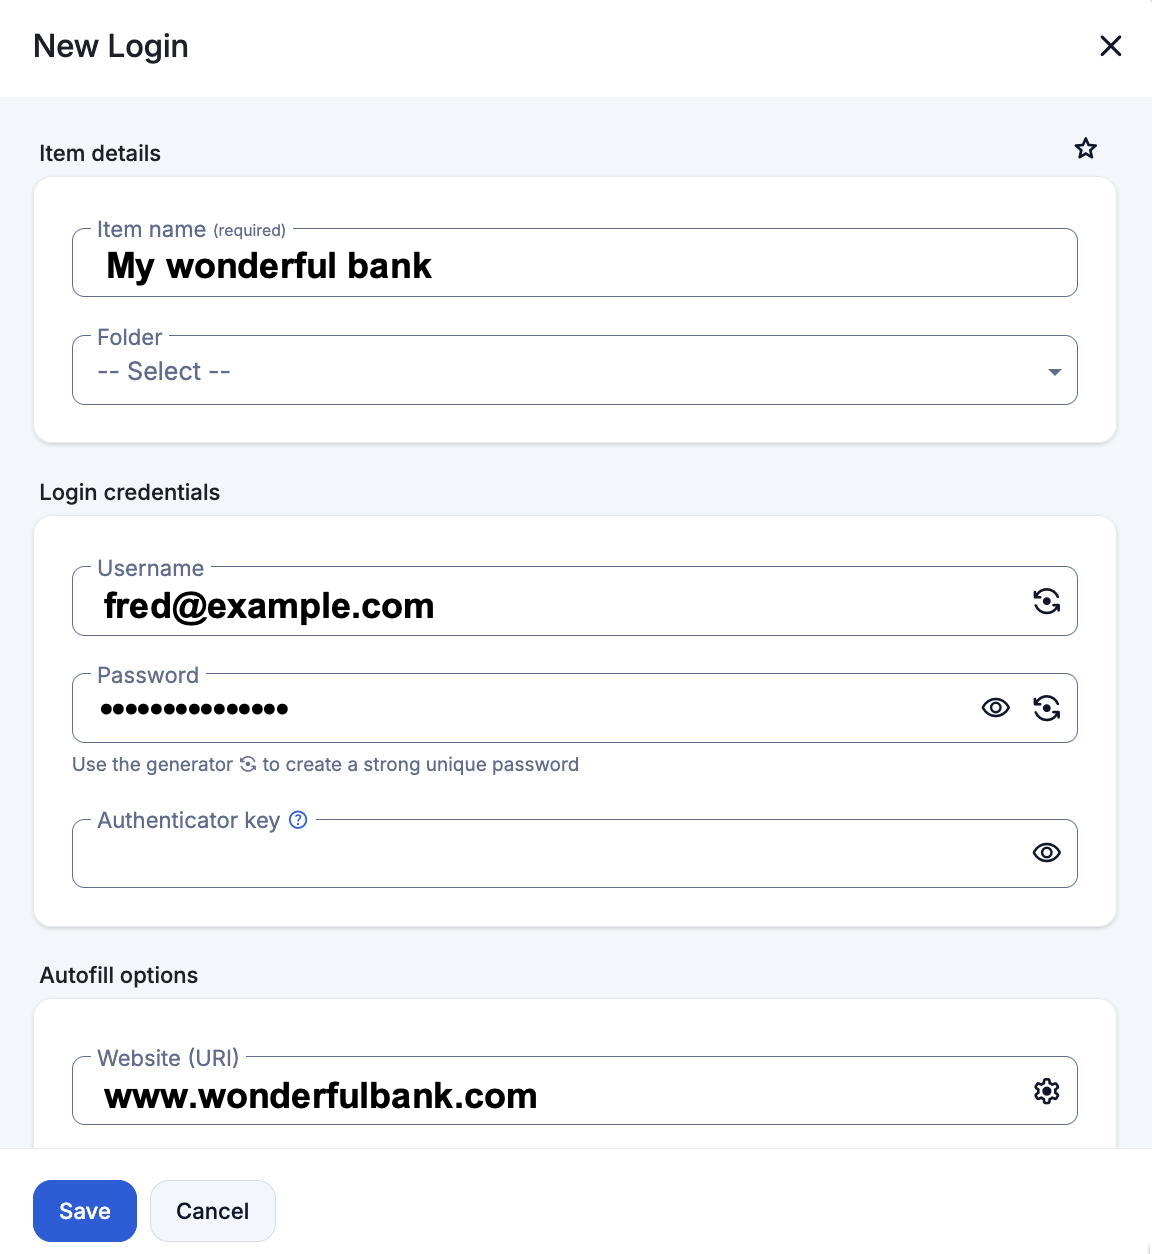
- You'll see a dropdown menu: choose "Login". Then fill in the four fields highlighted below (see the screen shot at the bottom of this post):
- Set the Item name to whatever makes sense to you: Gmail, Bank, Credit card company, Netflix account, Wi-Fi passwords, Amazon, Insurance, etc.
- Ignore “Folder” for now (I don’t use them)
- Enter the Username and Password for that account
- Scroll down a little more in that window to Website (URI). Enter the link to the website where you will use the credentials
- (Optional) There's a Notes field farther down. You can type any information here, such as your account number, the company's address, phone number, etc. Bitwarden ignores this field – but it saves it for you.
- Click Save… and you’ll see that item listed in the vault. Bitwarden has saved that information – forever.
Do this one-by-one for all your stickies.
Checking the item: It’s also worth checking the info as you go. Click an item in the vault to open it (similar to the screenshot below). Click the arrow ( ) next to the link to go to the site. Enter the username and password that you have recorded in Bitwarden. Once you have successfully logged in, you can throw away the sticky note. Or maybe put it in the envelope with the paper where you wrote the Master Password.
Retrieving your username and password
- Log into your Bitwarden vault (https://vault.bitwarden.com) You'll see all your items
- Click an item: it'll open a window similar to the screenshot below
- You can see your username. Click the "eye" icon to see your password. Click the "overlapping squares" ( ) to copy each one and paste it as needed.
Summary: This description gets you going with Bitwarden. I describe the web version first because it will work for all machines, no matter how old. But there's lots more: there are iPhone, Android, Windows, Mac, Linux and browser-based versions of the Bitwarden app that can all connect to your vault. This means you can enter your credentials in one place and read them from other machines (and phones).
The Screenshot
This screenshot shows the window when creating a new item in the vault. When viewing an existing item, the icons at the right are slightly different. (See the and icons above for details.)